 AirScout Viewer
Support & guide
Getting started
You log in via view.airscout.be with the email address and password you received from AirScout. After logging in you see the available views per project as cards. Click View to open one — it opens in a new tab and works on computer, tablet and smartphone, without installation.
Does a card say "coming soon"? The view has been created but not yet filled — you will be notified as soon as it is ready.
Overview pages
Besides the individual views, you also have overview pages at customer and project level. Your customer page shows all your projects as cards; if you click through to a project, that project page shows all the 360°, 3D and ortho views that belong to it.
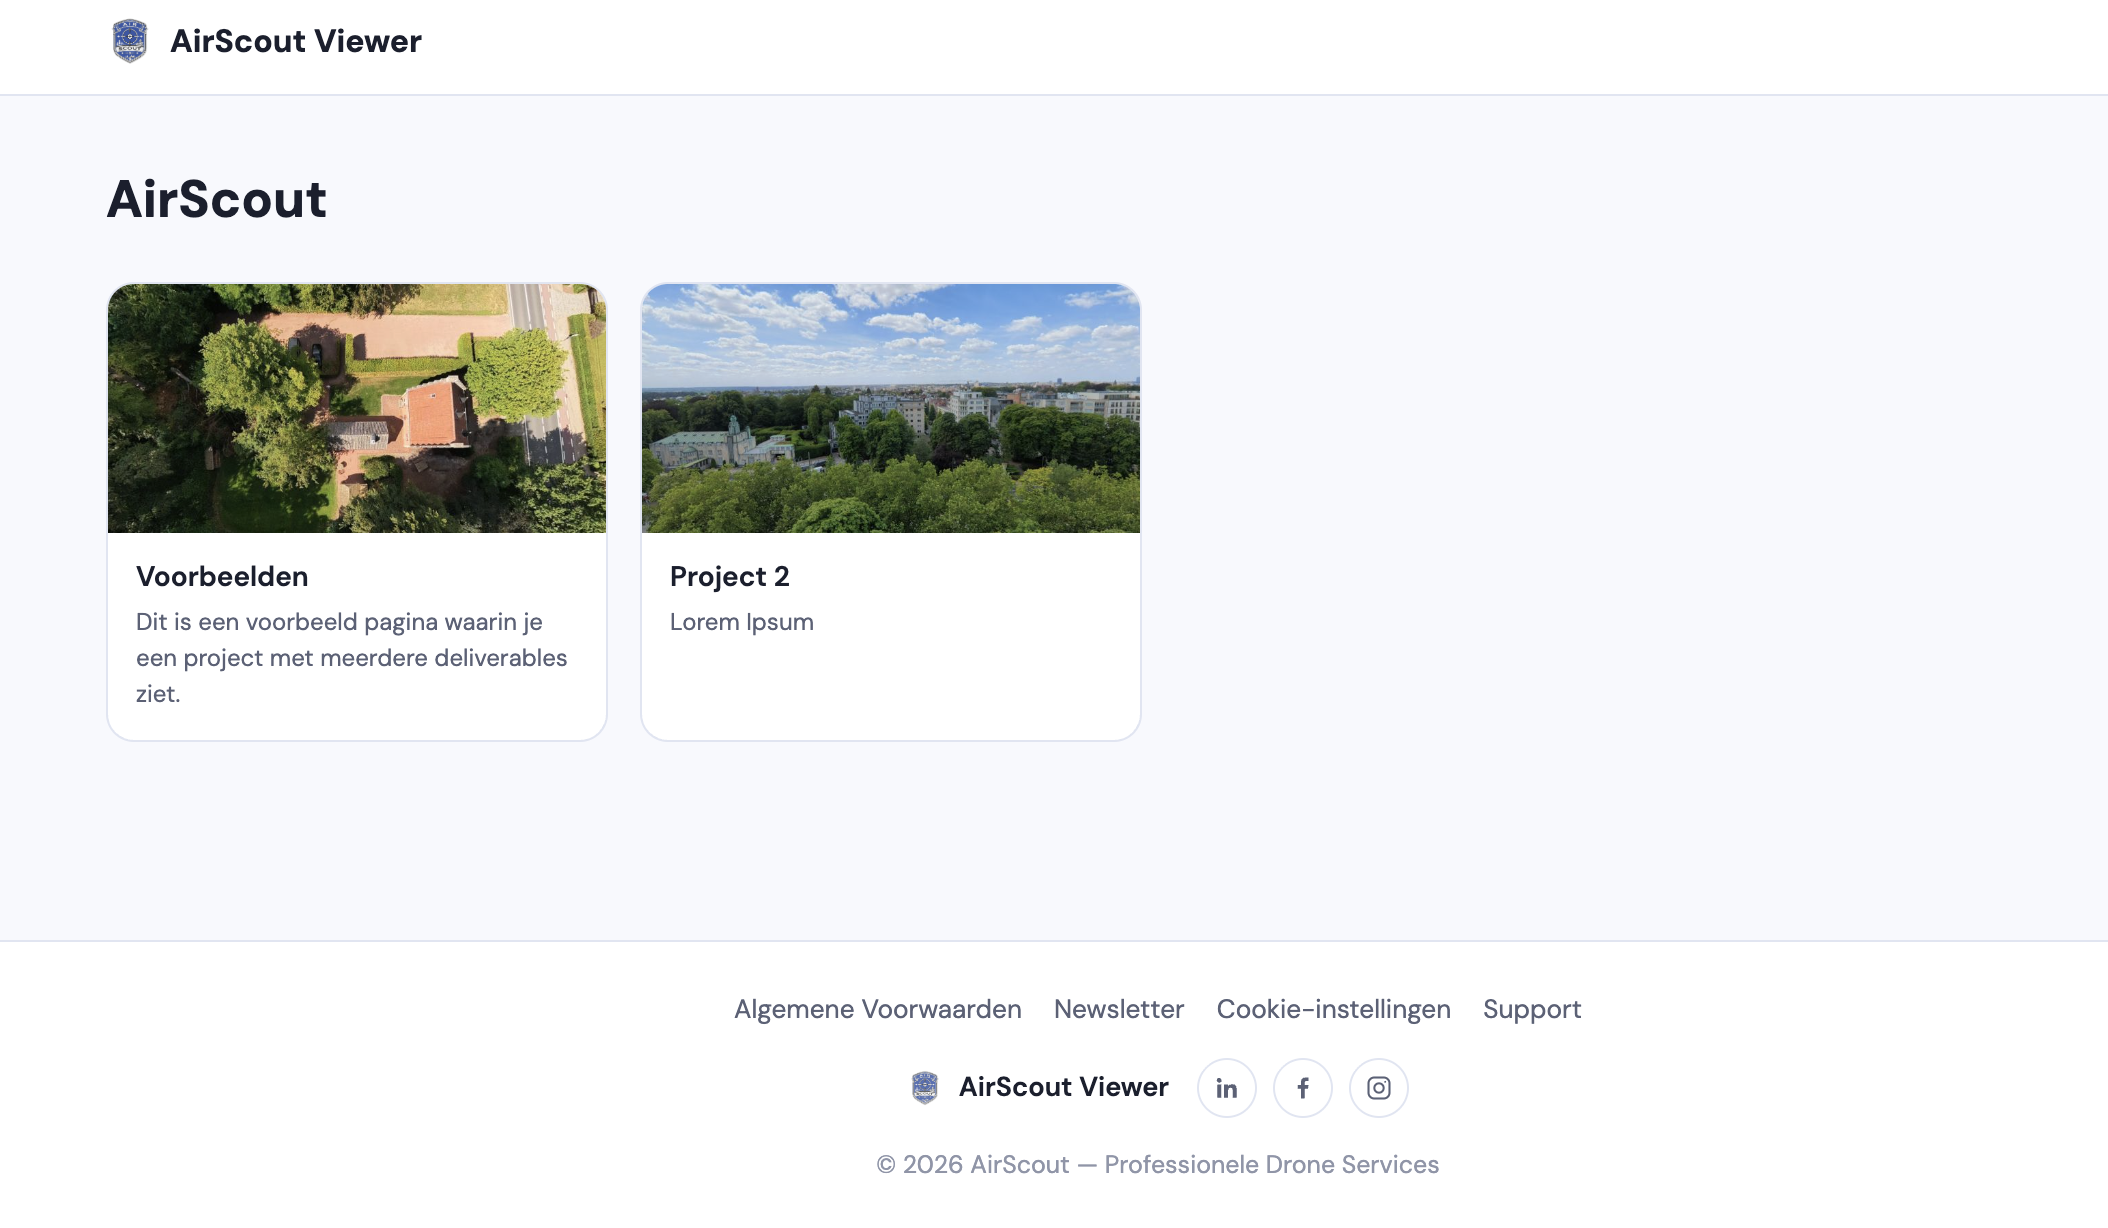
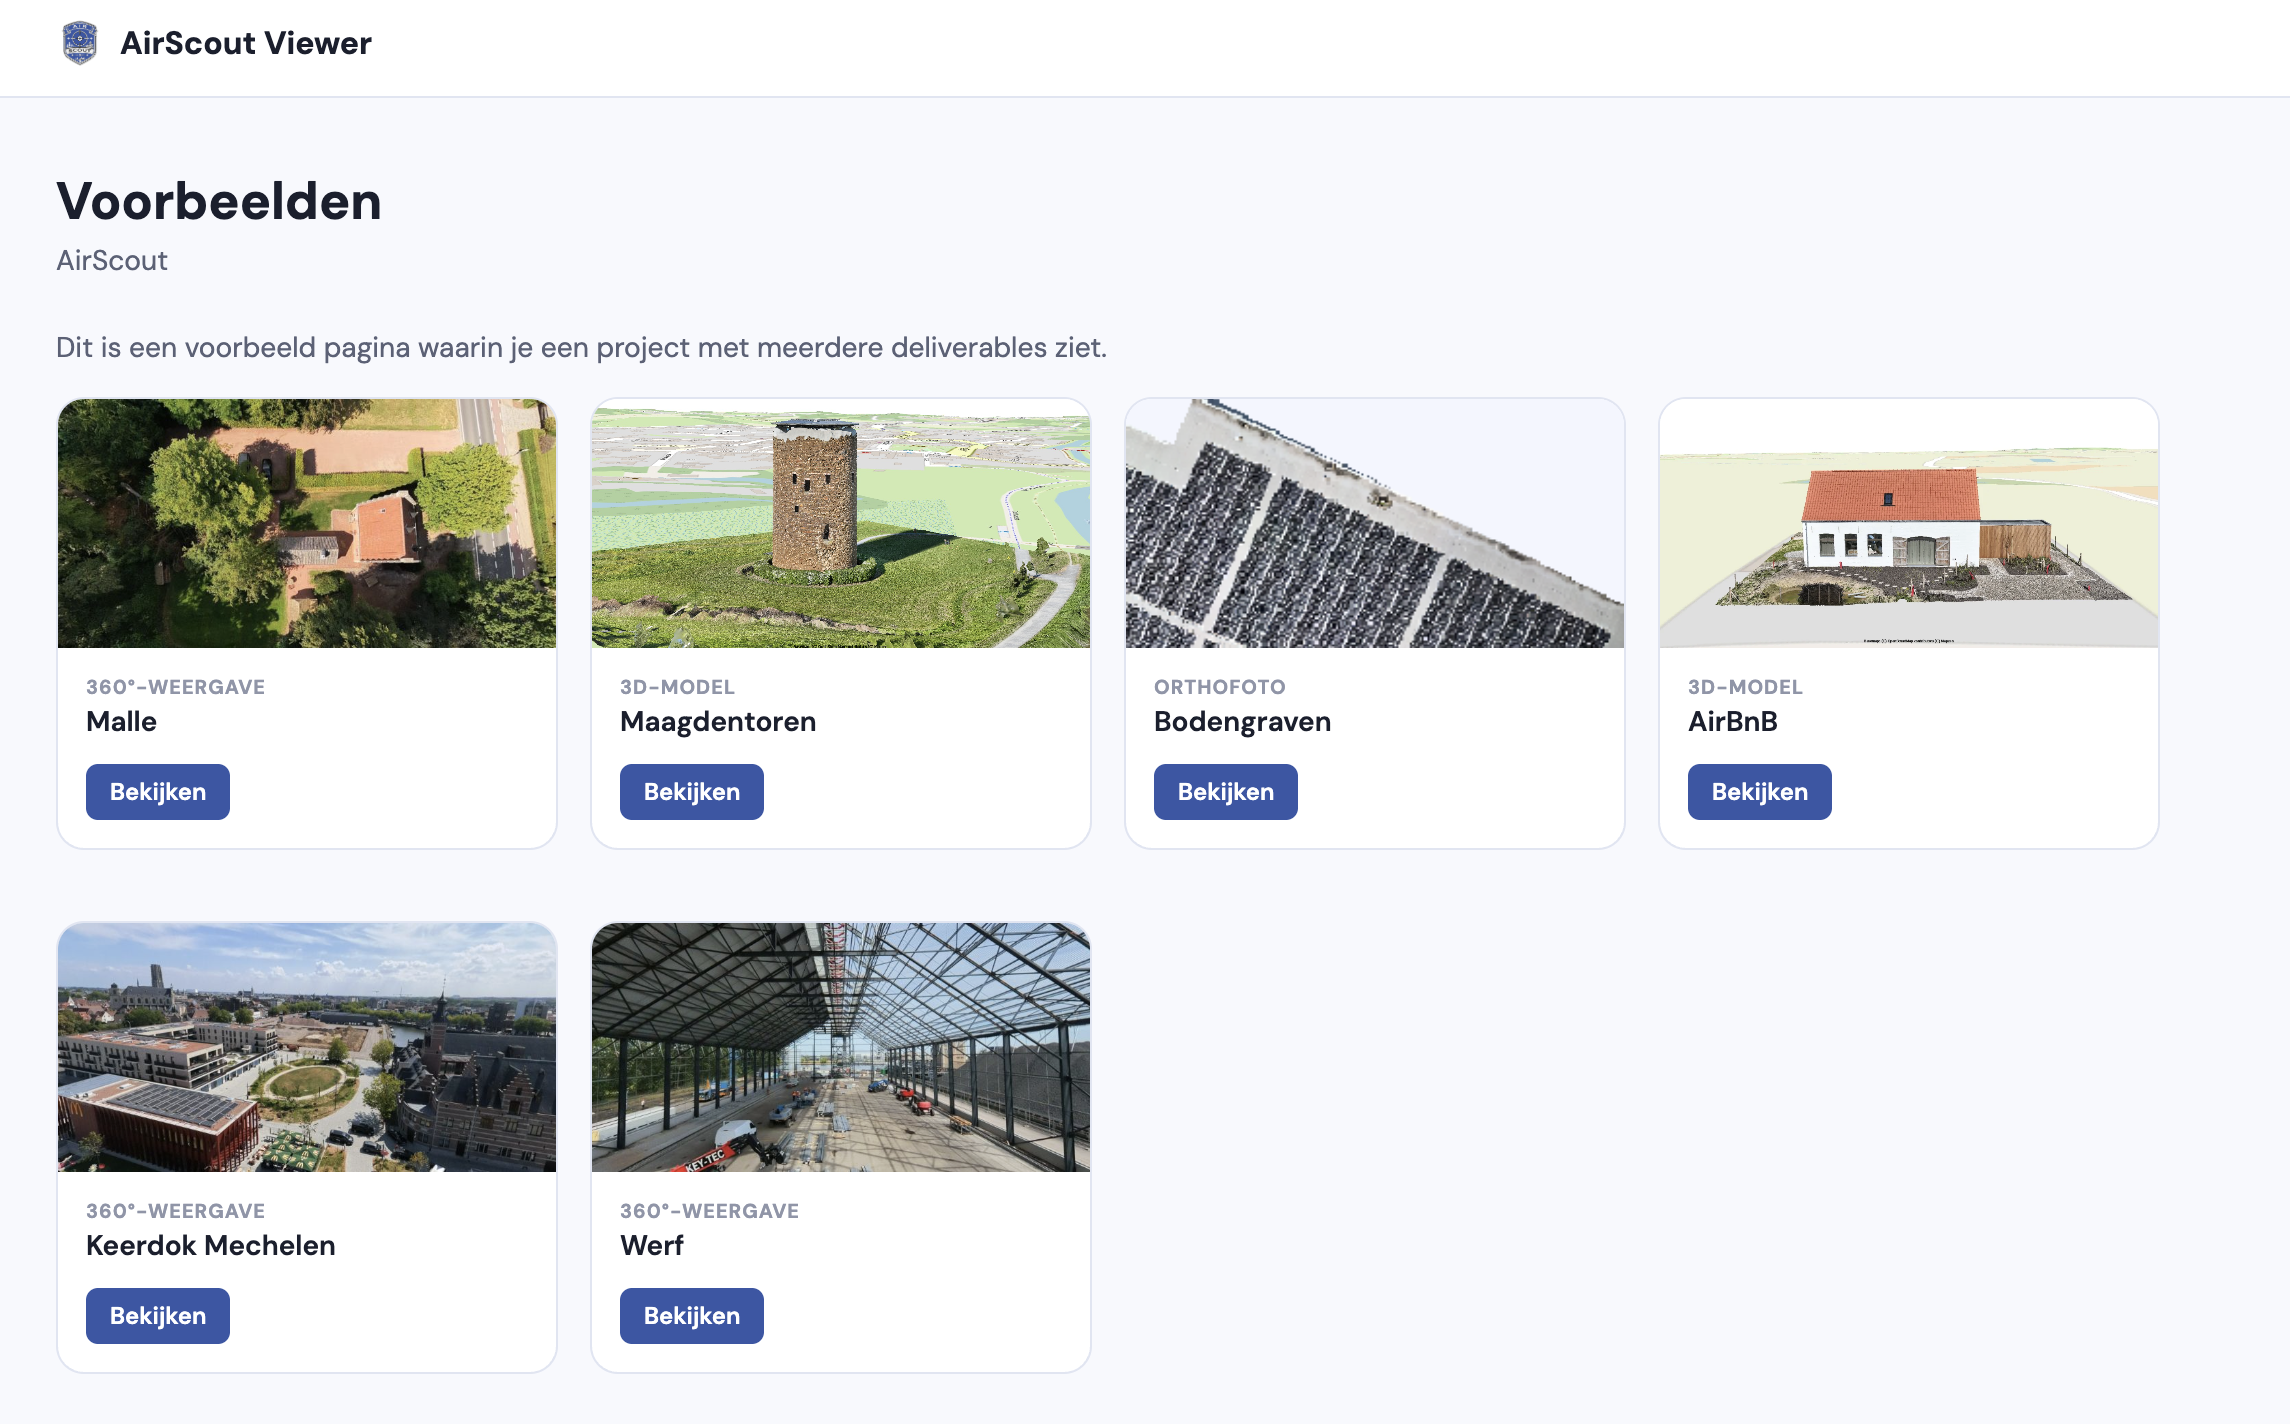
Those overviews also have their own shareable link — handy for bundling everything at customer or project level and forwarding it in one go, internally or to whoever needs to follow along. These overview pages are part of the Full subscription — read more under Sharing & embedding.
Managing your account
Adjusting names and description
Click the pencil next to a project or view name to give it a recognisable name of your own — handy if you prefer something other than the technical name AirScout uses internally. You can fill in or adjust the project description the same way. Note: this only changes what you and others see — shared links always keep working, even after renaming.
Trash
If you delete a project or a view, it does not disappear immediately but goes to your trash — found in the navigation, with a counter showing how many items are currently in it. There you can click "Restore" at any time to put an item back, as if nothing happened. If you delete an entire project, all views underneath automatically go to the trash with it.
Careful with a separately deleted view: if you first delete a single view and then the whole project around it, restoring the project does not automatically bring that one view back — you have to click "Restore" on it separately in the trash. This prevents you from accidentally getting back something you deliberately wanted gone.
An item left in the trash is permanently deleted after 90 days — you receive an email reminder well in advance. Would you rather have something really gone sooner (for example sensitive imagery)? You can then request permanent deletion from the trash itself: it is carried out after 7 days, unless you cancel the request within that period. As long as those 7 (or 90) days have not passed you can still put the brakes on — once the period has expired it really is permanent, and not even AirScout can reverse it.
Users & roles
As the account owner you can invite colleagues to your account. A user can view and edit everything (hotspots, labels, names), but cannot delete anything permanently. Only the owner can delete, manage users and edit the billing details. There is always at least one active owner on your account.
My account
Under "My account" in the navigation you change your own name, email address and password, set whether you want to receive trash reminders, and manage which devices are "trusted" (no verification code needed at login). Note: revoking a device applies to the whole account, not just to you.
360° viewer
Navigating
Managing hotspots & start position
With every 360° view in your portal you will find the Hotspots button. It opens the hotspot editor: double-click in the image to place a hotspot to another panorama, click an existing hotspot to remove it, and switch panorama at the top. With Save start position you set the viewing direction each panorama opens with. Below that you adjust the labels and the order of the panoramas.
Linking views together
If two views physically belong together — two zones of the same site, for instance — a hotspot can jump from one to the other. In the target list, pick the Other 360° view group instead of a panorama. An extra choice then appears: Start point in target view, which sets where the visitor arrives (the opening view by default). These hotspots show up in orange. In the editor they are deliberately not followable — clicking asks whether you want to delete them, so you don't lose your editing session. Test them from the normal view instead. You place the way back yourself, in the other view.
As soon as a hotspot points to a view, that view gets the linked label in your portal. If you want to delete it, the confirmation tells you how many hotspots point to it. Renaming, moving, or reordering panoramas never breaks a link — it keeps pointing to the same image automatically.
Link to one specific photo
If a view contains several panoramas, the link in your address bar follows along automatically while you navigate — via hotspots, the thumbnail strip, or the arrows. Copy the link at any moment (e.g. ending in /2 for the second photo) to share exactly that photo. Whoever opens that link lands on the same photo straight away — not on the first one in the series.
3D viewer
Tip: on a smartphone everything works with two fingers — rotating, zooming and panning.
Ortho viewer
The quality in the web viewer is deliberately capped to keep everything smooth. Need more detail? AirScout always supplies the high-res source files — the file guide explains how to open them with free software.
Sharing & embedding
Every view has its own link that you can forward directly to colleagues, partners, architects or insurers. Whoever opens the link looks along immediately in their own browser — without an account and without installation. On request, views can also be password-protected.
Renaming never breaks a link. If you later rename a project or a view via the pencil (see Managing your account), only what you and others see changes — the link/URL itself and every embed you have already placed stay exactly the same and keep working.
Via the Embed button in your portal you copy a single line of code to place the viewer directly on your own website or intranet — the view stays up to date automatically.
Besides the link per view there is also a browsable overview page per customer (all projects together) and per project (all views underneath) — handy internally, or to pass on to a customer so they can navigate several deliveries themselves without requesting a separate link each time. It is useful for AirScout too: quickly checking or linking to something per project, without first having to look up the right deliverable link. These overview pages belong to the Full subscription — on Standard every individual view link always keeps working, but the customer/project overviews themselves show a message that they are Full-only. Interested in Full? Contact AirScout.
Branding (white-label)
With a Full subscription you can bring the title card in the top right of your 360°, 3D and ortho views fully into your own brand: your own company name instead of "AirScout", a link to your own website instead of www.airscout.be, your own logo instead of the AirScout logo, and your own colour for the card itself. Ideal if you send the views straight to your own clients or place them on your own website and want to be recognisable there.
Where do I set this up?
In your portal, go to Settings > Branding (only visible and editable to the account owner). You will find five fields there:
- Own name — replaces "AirScout" at the top of the title card. Maximum 40 characters.
- Own website URL — where visitors go when they click the link at the bottom of the title card. Just type your domain name (e.g. "mycompany.com") — "https://" is added automatically if you forget it.
- Own logo — appears to the right of the title card, where the AirScout logo is now.
- Title card colour — replaces the AirScout blue of the card itself. Pick your brand colour with the colour picker; a button sets everything back to AirScout blue in one click.
- Text colour on the card — white or dark. Deliberately not a free colour: this keeps the text readable at all times.
You do not have to fill in everything: if you only add a logo and leave the name and URL empty, those two will simply keep showing "AirScout" — only what you fill in is changed. So you can build this up step by step.
Choosing the card colour
The title card is semi-transparent and sits over your image, with a slight blur underneath. The colour on the card therefore always looks a little softer and darker than the one you pick — that is normal, and it keeps the card from sitting on your panorama as a hard block. The preview below the fields shows the combination straight away, so you do not have to guess.
Rule of thumb for the text colour: choose white with a dark brand colour and dark with a light one. With white text a subtle shadow is added automatically, so the name stays readable even over a bright panorama.
Requirements for your logo
To look neat in every view, your logo has to meet a few rules. The page itself shows a clear error message if something is wrong, but here is an overview up front:
- File type: PNG only. Preferably choose a PNG with a transparent background — that way your logo sits neatly on the blue title card, without an ugly white or coloured square around it.
- Shape: your logo must be square (as many pixels wide as high). If you have a rectangular logo, first place it on a square, transparent canvas yourself — any free image editor (or even PowerPoint) can do that.
- Dimensions: between 200×200 and 1000×1000 pixels. Smaller looks blurry, larger is simply unnecessary for such a small logo.
- File size: maximum 500KB.
Once uploaded, your logo automatically gets a subtle rounded corner — you do not have to do anything for that. If you upload a new logo, it immediately replaces the previous one everywhere it is used.
What always stays AirScout, even with branding?
If you place a view as an embed on your own website (see above), a small, subtle AirScout logo always stays in the corner — even with your own branding active. That is deliberate: it is how AirScout stays identifiable as the maker of the view, even when it is otherwise entirely in your house style. Your own name, URL and logo do remain visible on the title card when someone opens the view directly (so not as an embed). No Full subscription yet but interested? Contact AirScout — we are happy to look at what is possible together.
Frequently asked questions
Which browser works best?
All recent browsers work: Chrome, Edge, Safari and Firefox. For the smoothest experience with 3D models we recommend Chrome or Edge. Make sure your browser is up to date.
Does it also work on smartphone or tablet?
Yes — all viewers work on touchscreens. Swipe with one finger to rotate or look around, and use two fingers to zoom and pan.
A view does not load or stays black — what now?
With an unstable connection the viewer shows a retry button itself. If that does not help, reload the page (F5, or pull the screen down on mobile). If the problem persists, get in touch via our support page.
I forgot my password.
On the login page, click "Forgot your password" and enter your email address — you will immediately receive a link to set a new password yourself. Still stuck? Get in touch via our support page.
How do I open the high-res source files (GeoTIFF, point cloud, 3D model)?
Besides the web viewers, AirScout always supplies the original full-resolution files. The file guide on airscout.be explains per file type which free software you need and how to open them.
I accidentally deleted something — can I get it back?
Yes, almost always. Deleted projects and views first go to your trash — just click "Restore" there and the item is back as if nothing happened. That is possible up to 90 days after deletion, or up to 7 days after an explicit request for permanent deletion. See the Managing your account section above for the full story.
How long do my views stay available?
For as long as your subscription runs, all your projects and views stay available online in your portal. Questions about your subscription? Contact AirScout via our support page.
How does billing work?
Your subscription is invoiced annually and in advance. Under Settings > Billing details in your portal you see your current subscription, the amount and the date of your next invoice — that is also where you keep your billing details up to date. A question about an invoice? Get in touch via our support page.
I uploaded a logo for Branding, but I do not see it in the view.
First check whether it is really saved: go to Settings > Branding in your portal and see whether your logo is visible there. If it is not, the file probably did not meet the requirements (PNG, square, 200-1000 pixels, max. 500KB) — the page then shows an error message with the exact reason. If the logo is there but you do not see it in the view itself, try refreshing the page with an empty cache (Ctrl/Cmd+Shift+R). If the problem persists, get in touch via our support page.
Can I link two 360° views together?
Yes. If two views form a single whole — two zones of the same site delivered separately, for example — place a hotspot that jumps from one to the other. Open the hotspot editor, double-click where the transition belongs and pick the Other 360° view group as the target. You also choose which panorama the visitor arrives at. These hotspots are orange rather than blue, so visitors can see they are moving to another view. More detail under 360° viewer above.
Question not answered? We are happy to help further.
Neem contact op met AirScout